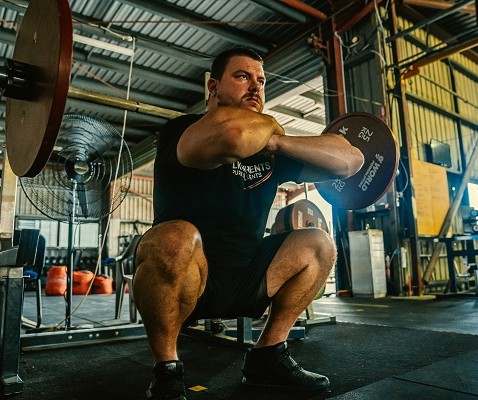
Squatting 101 - Basic Techniques for Correct Lifting

1. Hand placement while squatting
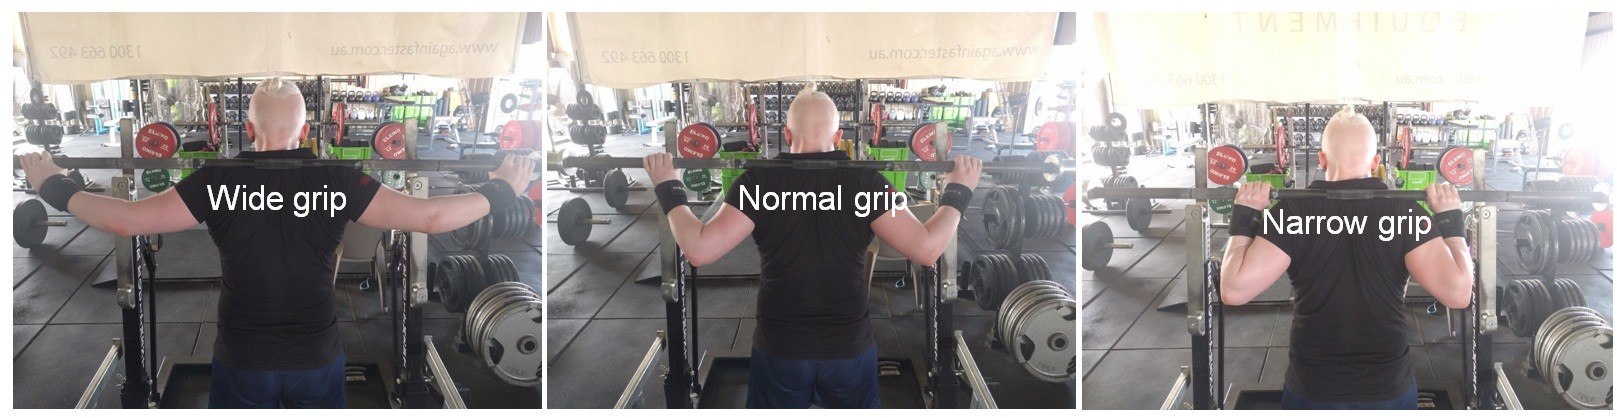
Grab the bar and use the knurling or lines on the bar to measure your grip and make sure it’s symmetrical. Grip width varies widely based on the size and mobility/flexibility of the individual but in short, a narrower grip means a tighter upper back and a better ‘shelf’ for the bar to sit on. Aim to find the narrowest grip you can comfortably use without experiencing pain or discomfort during your squats.
2. Thumbs position during the squat
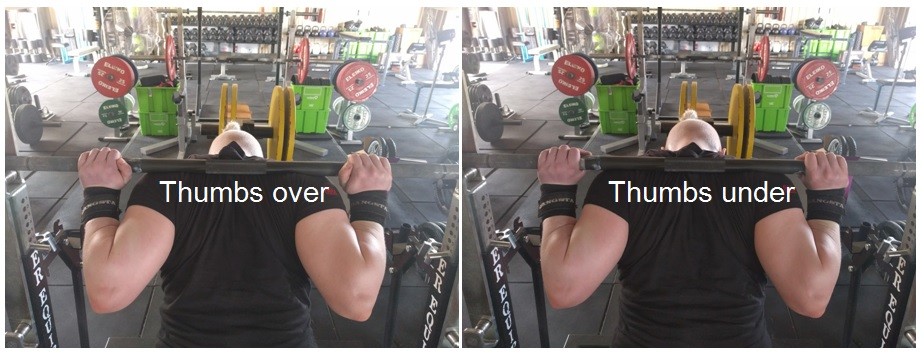
When you grab onto the bar you’ll want to either wrap your thumbs under the bar or leave them over the bar in what is known as a ‘thumb-less’ or ‘false’ grip. I don’t mind which method people use, as long as they feel comfortable and their grip is secure. Most people use thumbs under but there are training styles and coaches who recommend thumbs over, such as Mark Ripptoe and his Starting Strength program.
3. High or low bar position during squats
After securing hands and thumbs, it’s time to place the bar on your back using one of two distinct squat styles, high bar or low bar.
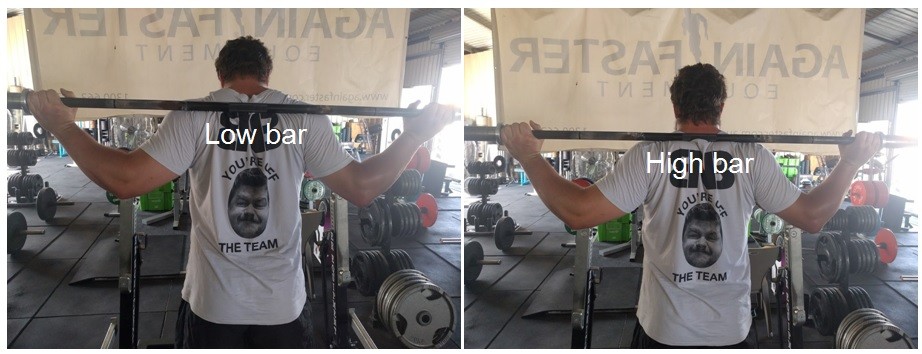
In high bar, the bar usually sits on top of the traps while in low bar the bar is placed on the shoulder blades and rear delts. While there are some technical differences between high bar and low bar, I recommend people focus on finding a bar position that feels comfortable and enables them to squat confidently and without pain. I personally prefer high bar as I find it much more comfortable on my back and reduces pain in my wrists and elbows. But I have a few clients who prefer low bar. It’s worth noting that in the picture below of low bar, the bar could be placed lower down the back if desired.
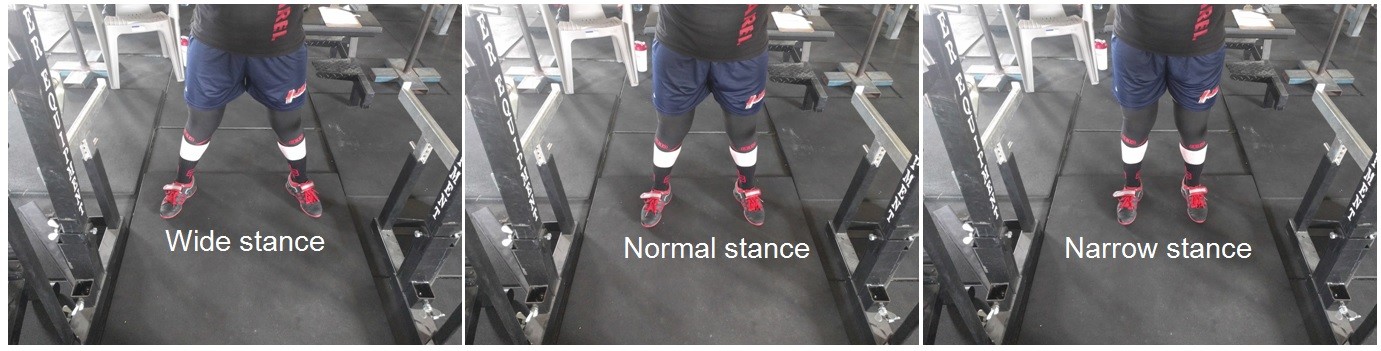
4. Squatting stance – foot width
After unracking and walking out with the bar, it’s now time to choose a foot stance before commencing the squat. This is very much a case of personal preference. In general, I recommend people choose a foot width of about shoulder width apart or slightly wider, which I’ve called ‘normal stance’ in the image below. Some people find a narrower stance works better while others prefer a wider stance so play around with foot width and see what feels most comfortable and allows you to squat with better technique.
One thing to note is that your knees are more likely to cave in when using a wider stance, so be sure to keep them tracking over your toes at all times.
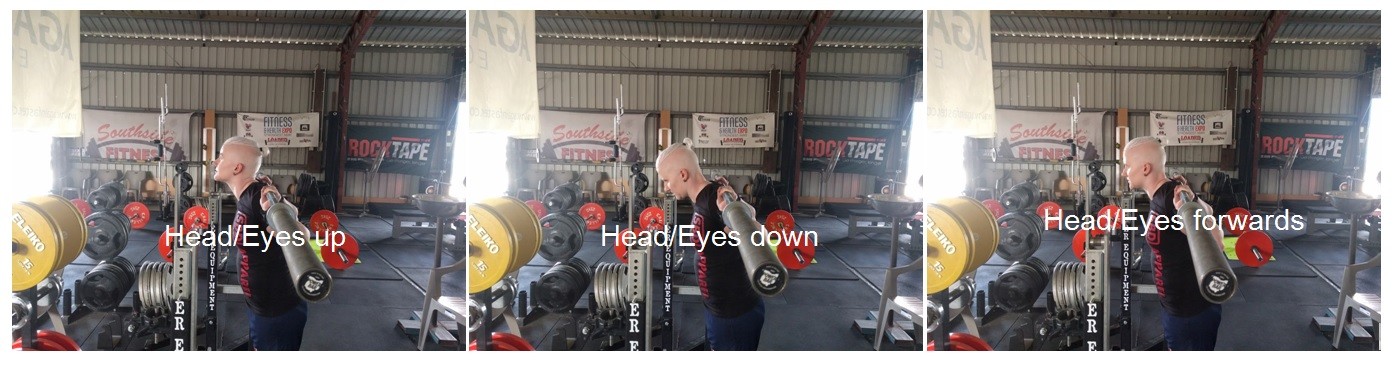
5. Head and eye position during a squat
There are three common ways people look during their squats – up, down or forwards. I recommend my clients look directly forwards and fixate on something ahead of them at all times during their squat.
I advise against squatting with your head tilted back and eyes looking up due to unnecessary strain on the neck. While there are coaches, lifters and training styles that recommend looking down during squats, I don’t like this method for beginners as I find people often fall forwards or round their upper back while using this style.
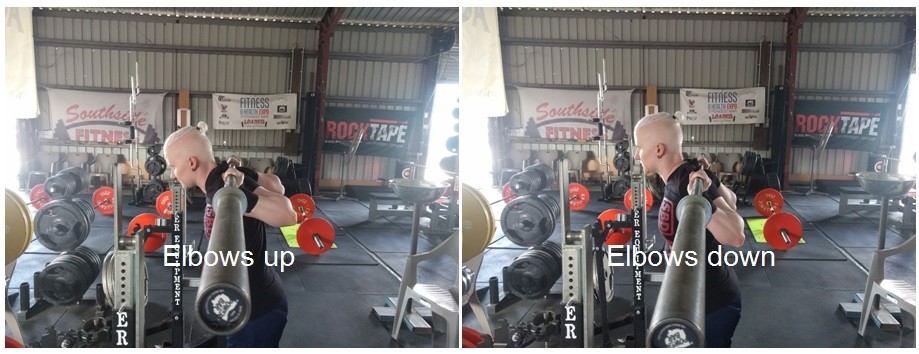
6. Elbow position for squats show be down
Pretty simple here. We want elbows down and chest up at all times during the lift. When elbows flare up, the chest is more likely to fall which rounds the upper back and shifts the bar forwards, all of which contribute towards an unbalanced squat and decreased lift efficiency. A common cue during squats is “chest up” but I’ve found that using “elbows down” tends to work better.
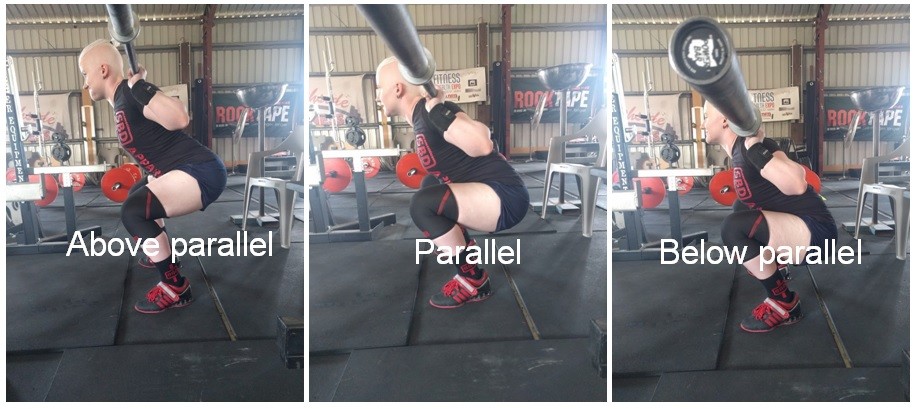
7. Ideal squat depth
It’s now time to squat. For most people, the goal of squats is to achieve parallel depth or below parallel, if technique and mobility/flexibility allows. Please avoid squatting high and performing “half squats” or “quarter squats” as all these do is destroy your knees, cause imbalances in muscle strength and lead to an increased risk of injury. If you find it difficult to reach depth consider squatting to a box set at parallel or below. You can be confident you’re hitting depth each rep provided you touch or sit on the box.
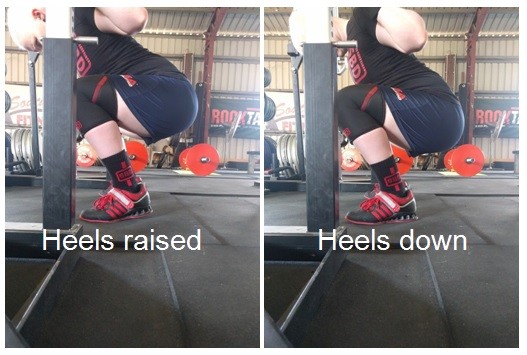
8. Heels position during squats, raised or down?
While squatting you want to ensure you keep your weight in your heels and press them firmly into the floor. Avoid raising your heels and driving through your toes as this leads to unbalanced squats and reduced muscle recruitment.
So that’s about it, but remember…
- During the setup: Hand placement, thumbs and bar position.
- Before squatting: Foot width, head/eyes and elbows.
- During squats: Squat depth and heels.
Once you’ve got the technique under control, why not try working towards increasing your squat max.
All the best!
Dave Napper is a world record breaking personal trainer, nutritionist, powerlifter and business owner.
He is the owner-operator of Brisbane North Barbell, helping to train the next generation of powerlifters and strongmen.
More about Dave Napper